ip address

How to change your IP address in browsers?

Why do you need a browser that can change IP?

  • “Why was my account suspended?”

  • “Why do I always get some sort of promotion from nearby when I go online?”

  • “Why do I get so much junk in my mailbox?”

  • “Why can’t I access the website?”

Has your browsing experience gotten worse? Do you have these questions in front of the screen? When you are worrying about these things, have you ever thought that trouble is actually caused by IP address!

ip address

When we use the Internet, we all have a network address to receive information from the Internet. This is an IP address. IP refers to the protocol address of the Internet. It assigns logical addresses to every host and network on the Internet. Whenever your devices are connected to the Internet, an IP address is generated.

But if you run into any of the above problems, you may need to change your IP address. When do you need to change IP addresses? In normal cases, the IP address does not need to be changed. However, you need to change the IP address in the following cases:

  • When you visit a website repeatedly using the same IP, the website may recognize you’re doing something unusual and block your activity by blocking an IP, which essentially deprives your IP of access to the network.
  • Want to encrypt your communications. Your emails, photos, bank data and other sensitive information will not be intercepted by third parties after we switch IP addresses.
  • To hide your IP and location, shielding yourself from ads.
  • Unblocks censored websites, making it easy for websites and servers to unblock them.
  • Some activities that require IP change—voting, promoting, signing up for an account, and so on—have to be constantly changed in order to operate.

How do I query the IP address?

Since every internet-connected device is assigned an IP address, whether you’re a computer or a phone, just open a browser and search: What is my IP to see which IP address your current device is connected to.

what is my ip

How to change IP addresses?

There are many ways to change IP addresses, depending on the device you are using.

1) If you are using your mobile phone to access the Internet, disconnect your phone from the network and reconnect it by turning it on and off in airplane mode, and the carrier will assign you a new IP address. (Dynamic Host Configuration Protocol automatically assigns an IP address within the region to the client)

2) If you need to change the IP address of your computer, you can restart the router so that the carrier can re-assign the IP address to you:

  • Power Off Restart

What if you forget your router admin password or do not want to log in to the admin interface to restart the router? Then you can choose to power off and restart.

To be specific, unplug the power of the router, wait for about one or two minutes, and then plug in the power again. After the router is powered off for a period of time, restart the power, which is equivalent to restarting the router.

  • Restart the router from your phone

Nowadays, routers generally support APP management. You can connect to the network through the AP of the router and manage the router through the APP. It is also very easy to restart the router with the help of the APP.

  • Restart from computer Settings

First of all, open the router administrator login address: 192.168.1.1 (typically this is different by brand, so you can refer to the label on the router’s body) in the computer browser, and then enter the router administrator account password to log in.

After opening router Manager, click on the left menu to expand “System Tools”, then find “Restart Router”, then click “Restart Router”.

Finally, according to the prompt, click to restart can be completed. The restart takes about 1 minute. After the restart, you can connect to the Internet again. Generally, the IP address may be changed after the restart.

  • Another convenient and quick way to switch IP is to use a special IP switching software to switch – using a proxy or VPN.

Using an agent or VPN saves you more time than manually shutting down the router. Browsers that can change IP addresses either need to manually enter the IP address you want to change, or operate this way.

Proxies or VPNs are usually available on both computers and mobile phones and can be specified in any urban area. They break through the limitations of the region, you can change to any region of the IP address, which is very convenient and quick.

When you choose IP software, you should give priority to IP quality, including but not limited to IP speed, stability, security. There are many online IP agents, so you have to polish your eyes when choose. You can try to choose the IP agent that suits you before buy it.

Do you need to know more about proxies and VPNs? 

Want to know how to choose a proxy? 


A browser that can change the IP address

IE browser

Internet Explorer is by far the most understood and used browser, and learning how to change between IPs in the IE browser is believed to help many people escape their worries.

  • First, open Internet Explorer, and then select the “Tools” TAB at the top of the browser window. Select “Internet Options” from the Tools menu;
  • In the “Internet Options” window, click the “Connections” TAB above, and then click the “LAN Settings” button;
  • In the LOCAL Area Network (LAN) Settings window that is displayed, select Use a proxy server for your LAN and click Advanced.
  • In the “Proxy Settings” window that pops up, set a different type of proxy server (such as HTTP, HTTPS or FTP), enter the address of the proxy server to be used, and click “OK” to complete.

Firefox

  • Open the Firefox browser
  • Select “Options” on the menu bar and go to the Network Settings section.
  • Click “Settings”, the “Connection Settings” dialog box is displayed.
  • Select Manually Configure proxy and enter the IP address and port number of the proxy server.

The proxy IP port varies with the protocol type. HTTP proxy, HTTPS proxy, and SOcks5 proxy are common, and their ports are 8080, 443, and 1080 respectively.

Chrome

  • Open Chrome on our computer, click on the list icon in the upper right, and select Settings.
  • After going to Chrome’s Settings screen, scroll down to the bottom and click Advanced.
  • After opening advanced Settings, find the Open Agent Settings under the system and click there.
  • After enabling proxy Settings, go to the Internet Property Connection interface and click LAN Settings.
  • Enter the LOCAL area Network (LAN) Settings screen, you can see that the default is automatic configuration, automatic detection Settings.
  • Deselect the automatic detection Settings, select the bit LAN under the proxy server to use the proxy server, enter the IP address and port number of the proxy, and click OK to complete the Settings.


The best browser that can change the IP address

Are you a computer nerd? Have you read the above introduction without knowing what IP address to enter? Or are you tired of manually entering an IP address? Which agent to choose? If so, we are happy to tell you that these problems will soon be resolved!

With ClonBrowser, all problems will be solved! It won’t take you a second!

ClonBrowser

ClonBrowser is very focused on your experience. This browser has a convenient and comprehensive proxy mode, supporting a variety of proxy protocols, including HTTP, HTTPS, Socks5, Shadowsocks. At the same time, software inheritance supports a variety of agents, so you can just fill in the agent information and bind it with one click!

The agents we provide are :

Here, you are free to choose your proxy without any hassle.

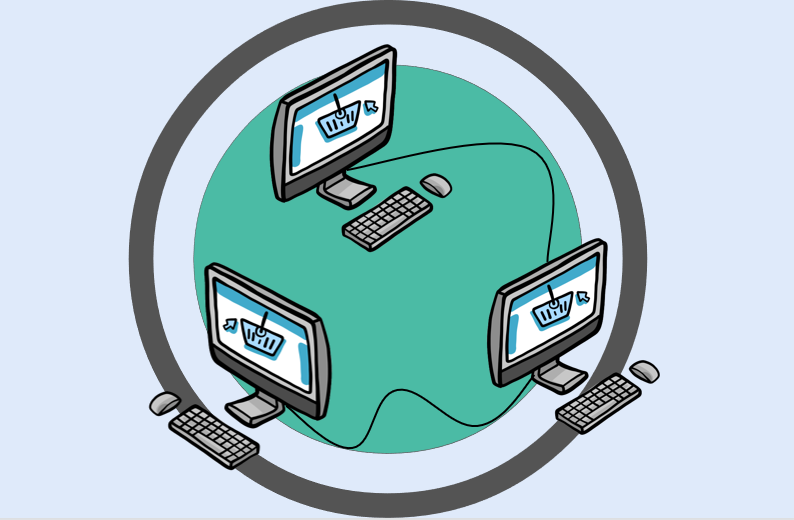
As a virtual browser, ClonBrowser is more than just an agent integration. It uses virtual configuration technology to enable you to do things on one computer that can be done on multiple computers, helping you beat e-commerce, social marketing, and sales comparisons!

To learn more about ClonBrowser, please click here to enter the official website for inquiries! We look forward to your arrival!

webrtc

WebRTC IP Leaks | How to test and prevent WebRTC Leaks?

Why need to pay attention to WebRTC IP Leak?

Webrtc is indeed a way that leads to IP leaks. It poses a threat to anyone who uses a VPN and tries to remain anonymous online without showing the real IP address. Many users asked online:

“Should I turn off the WebRTC?”

“How do I know if WebRTC has leaked my IP?”

In fact, we enjoy and worry about the Internet every day. We always feel like we’re being monitored by the Internet. The Internet may know our private information, such as what we bought yesterday and what we browse today. It’s true that the Internet even knows where you live — via an IP address. There were 152,000,000 Google searches for “IP leak”. We can find that “webrTC IP leak” is also a big part of it.

Don’t be afraid, keep reading and you’ll find yourself finding an article that will help you! We’ll show you how WebRTC leaks your IP address, the way to know if your IP is leaked, and how to prevent  WebRTC IP leaks.

webrtc


What is the WebRTC

WebRTC, whose name comes from an abbreviation for Instant Web messaging, is an API that enables web browsers to conduct real-time voice or video conversations. It allows voice, video chat, and P2P sharing (real-time communication) in the browser without the need to add additional browser extensions.

The history of the WebRTC

In May 2010, Google acquired the GIPS engine of VoIP software developer Global IP Solutions for $68.2 million and renamed it “WebRTC.” WebRTC uses THE GIPS engine to achieve web-based video conferencing and supports 722, PCM, ILBC, ISAC and other encodings. It uses Google’s own VP8 video decode and also supports RTP/SRTP transmission.

Google integrated the software into its Chrome browser in January 2012. Meanwhile, the FreeSWITCH project claims support for iSAC Audio CoDEC.

Characteristics of the WebRTC

1) WebRTC implements web-based video conferencing, which is based on WHATWG protocol. The main purpose of WebRTC is to enable Web developers to easily and quickly develop rich real-time multimedia applications based on Chrome, Firefox, and other browsers, without downloading and installing any plug-ins. Real-time communication capabilities can be achieved by writing simple javascript in a browser. Is an open-source software.

2) WebRTC provides the core technology of video conference, including audio and video collection, coding and decoding, network transmission, display, and other functions

3) Although WebRTC was originally developed by Google, it supports Windows, Linux, MAC, Android, and many other platforms.

4) Whether used for personal or business activities, it is free.

5) It can be used for mobile applications.

6) It offers better sound quality compared to Flash, with built-in adjustable microphone Settings. WebRTC is known for its ability to enhance video and audio chat.

WebRTC hopes to build a robust real-time communication platform between multiple Internet browsers, forming a good ecological environment for developers and browser manufacturers. Google is also working to make WebRTC’s technology one of the HTML5 standards.

Browser support

browser support

WebRTC is supported in the following browser versions:

  • Desktop PC Side: Google Chrome23, Mozilla Firefox22, Opera18, and Safari11
  • Android: Google Chrome 28 (enabled by default starting from version 29), Mozilla Firefox 24, and Opera Mobile 12
  • Google Chrome OS
  • Firefox OS
  • iOS 11
  • Blackberry 10 features a built-in browser: Bowser


How does WebRTC leak IP?

WebRTC’s IP leak was discovered by Daniel Roesler in early 2015. He pointed out that:

Firefox and Chrome have implemented WebRTC that allow requests to STUN servers to be made that will return the local and public IP addresses for the user. These request results are available to javascript, so you can now obtain a user’s local and public IP addresses in javascript.

Additionally, these STUN requests are made outside of the normal XMLHttpRequest procedure, so they are not visible in the developer console or able to be blocked by plugins such as AdBlockPlus or Ghostery. This makes these types of requests available for online tracking if an advertiser sets up a STUN server with a wildcard domain.

WebRTC uses Session Traversal Utilities for NAT (STUN), TURN, and ICE to penetrate firewalls or NATs on the VoIP network. The user sends a request to the server, and the STUN server returns the IP address and LAN address of the system the user uses.

The returned request can be retrieved in JavaScript, but because this process takes place outside the normal XML/HTTP request process, it is not visible from the developer console. This means that the only requirement for this vulnerability is for the browser to support WebRTC and JavaScript, and any site can simply execute some JavaScript commands to get your real IP address from a Web browser.

The threat of WebRTC IP Leak

The vulnerability allows web administrators to easily see a user’s real IP address through WebRTC, even if the user uses a VPN to hide their IP address. The vulnerability affects WebRTC-enabled browsers, including Google Chrome and Firefox, although it appears to affect only the Windows operating system.

ip leaked

Network security researcher Paolo Stagno tested 70 VPN providers and found that 16 of them had leaked users’ IP addresses through WebRTC (23%).

Check for IP leaks

  • Connect to the VPN proxy
  • Access:ip.voidsec.com

If you see the public IP address in the WebRTC column, you have exposed your identity. If the WebRTC leak inspector indicates that you have a leak, you can take the following 6 steps to confirm that it is 100% correct.

  • Disconnect from your VPN.
  • Open a new page in a new window, and simply type ‘What’s my IP?’ into your browser’s search bar to find your IP address.
  • Write down all the public IP addresses you see.
  • Close the page.
  • Reconnect to your VPN and reopen the page.

If you see any of the same public IP addresses after reconnecting to your VPN, you have a leak. If not, your IP address is secure.

Will the VPN protect me from WebRTC IP Leaks?

There are some VPNs that can protect against webRTC vulnerabilities. Here are the VPNs that protect users from WebRTC leaks through firewall rules:

1) Perfect Privacy: The Perfect Privacy VPN client is configured to prevent WebRTC vulnerabilities.

2) Express VPN: Express VPN has updated its software to further protect users from WebRTC leaks.

Note: Just like browser fingerprints, WebRTC issues are a vulnerability in Web browsers. Therefore, it is better to fix the root cause of the problem through your browser rather than relying solely on VPN protection.


How to prevent WebrTC IP Leak

For users who do not want their real IP addresses to be leaked, you can disable WebRTC to prevent the leakage of real IP addresses.

Firefox:

1) Enter “about:config” in the browser. And then search “media. peerconnection. enabled”. Double-click it and change it to “false”.

2) Type “about :config” in the URL bar, then press Enter. Then, agree to the warning message and click “Accept the risk!” Then, in the search box type”media.peerconnection.enabled”. Double click on the “media.peerconnection.enabled” name of the preference value changes as “false”.

Chrome:

1) Since WebRTC cannot be disabled in Chrome (desktop), additional components are the only option (for those who don’t want to give up using Chrome). As mentioned above, it’s important to remember that browser add-ons are not 100% efficient.

In other words, you may still be vulnerable to WebRTC IP address leakage under certain circumstances.

There are some add-ons worth considering: WebRTC Leak Prevent /uBlock Origin. (Install the “WebRTC Leak Prevent” extension, set the “IP handling policy” option to “Disable non-proxied UDP (force proxy)” and click “Apply Settings” to apply.)

2) On your Android device, turn off the WebRTC in URL chrome://flags/. Scroll down to find the “WebRTC stun origin header” – then disable it. For security, you can also disable the WebRTC hardware video encoding/decoding option, although this may not be required.


Conclusion about WebRTC IP Leak

The WebRTC vulnerability highlights a very important concept for those seeking higher levels of online anonymity and security through various privacy tools. The browser is usually the weak link in the chain. Therefore, it is important to pay attention to the browser itself.

use ClonBrowser to protect privacy

ClonBrowser is a very powerful browser, it is very important to protect your privacy! If you have been worried about browser security issues, you can click here to learn more about our features! I believe it will bring you unexpected surprise!

different browsers location settings

How to control your browser location settings

Why should you care about browser location settings

You’ve probably heard that when you surf the Internet, a lot of information about yourself is revealed. But do you know what kind of data is actually collected by someone?

In fact, the browser collects the following information (not limited to this):

1) Data about your hardware and software

2) Network connection. This information includes the IP address and browser speed.

3) Browse history

4) Mouse movement and clicks on websites. The way you move your mouse represents your operating habits.

5) Which fonts are installed on the computer and the language used on the operating system.

6) Your location.

location is exposed to the internet

When you’re not using a browser, your data is constantly being uploaded, including your location. Perhaps you do not care about the Internet access to their computer information, but no one is willing to expose their whereabouts at any time, and some of them are as accurate as tens of meters, causing fear.

The development and popularization of the mobile Internet have greatly changed our life patterns. However, it is a double-edged sword. While bringing us great convenience, it also makes our privacy protection and personal information security face a series of risks and challenges.

There is no doubt that browser geolocation technology wasn’t created to invade your privacy. They were created to enable us to live a better life. For example, when you search for a product, the browser will provide you with the nearest store so that you can use it quickly. For example, the browser location can connect to the weather function to alert you to recent weather changes. These convenience features make it impossible to reject a location-based browser.

The Internet has done unrivaled good for bringing people and nations closer together, making the virtual world feel almost like reality. But, sadly, some people take advantage of this physical distance to steal. Spammers, phishers, cyber thieves, and so on take advantage of the fact that it is difficult to monitor online activity or events. Your movements are observed on the Internet, and your personal identity begins to form. When precise geolocation is used illegally, personal and property security issues such as illegal detention and fraud can also start to jeopardize your life.

This article will teach you how to set up your browser location settings and give you control over your location.


Different browsers location settings 

There are many browsers available to users in the market today. Among them, IE, Chrome, and Firefox dominate most markets, while Microsoft Edge and Apple Systems’ own Safari have more and more loyal fans. So we will show you how to set up and share your geographical location with your browser.

IE

Generally speaking, when you open Internet Explorer, the browser will ask you if you want to disclose your location information. If you agree to disclose your location information, then your location information will be sent to the browser.

However, if you want to adjust your location settings and manage your location, you can use IE’s Privacy Settings to adjust how your browser monitors your behavior and determine whether and when sites can access your location information.

To do this, all you need is:

1) Double-click the IE icon on the desktop to start IE.

2) Locate the Tools button in the upper right corner of the page and click Internet Options.

3) In the privacy TAB, you are free to choose whether to select the “do not allow websites to request your physical location” option.

When you select location, the browser will confirm again that you are allowing the site to use the current location. At this point, you need to choose whether to allow tracking of a location only once or always. When you turn off the option to ask for a location, you need to clear the permissions you have granted to your site.

Google chrome

Like IE, Chrome will ask for your opinion when tracking your location. If you agree to enable location and share your location, please check chrome’s privacy policy.

If you did not select a shared location before and you now have a need for a share location, you can:

1) Click the Chrome icon in the browser toolbar to launch the browser,

2) Click “Settings”. After entering the Settings page, in the “Privacy Settings” section, click “Website Settings” (Website Settings can control what information can be used and displayed on the website).

3) In the dialog box that displays, scroll down to the “Locations” section. Select “Allow all sites to track my location” or “Ask before Tracking” to allow all sites to automatically access your location.

different browsers location settings

When you need to change (allow or delete) the Settings for a particular site, just click on the special icon (usually in the shape of a lock) to the left of the site’s URL to enter the site Settings and modify permissions.

Firefox

Firefox’s Location service is also optional. It won’t share your location without your consent, but with your consent, Firefox will locate your information and share it with sites that require location information. If you refuse to share your location, nothing will happen.

To make new settings for a location, you can:

1) Click the Firefox icon to open the browser

2) Click “Settings” to open the setting interface, select “Privacy and Security”, slide down to “Permissions” and find “Location”.

3) Click the “Settings” option on the right of “Location” to reset location permissions. Here you can allow a site to request your location, or you can prohibit new location requests.

Note that if you let your browser remember your choice of location permission, the browser will automatically follow the previous guidelines in any subsequent situations that require a choice.

Microsoft Edge

The first time you visit a site that requires location information, Microsoft Edge asks you for permission. When the location is turned on, you can also control the site’s queries you at any time.

If you want to adjust location Settings, you can:

1) Click the Microsoft Edge icon to launch the browser,

2) Tap the three dots in the upper right corner to go to “Settings”. After entering the Settings page, find the Location option in “Site Settings”.

3) After turning on the “Location” option, you will see the “Ask before tracking” option. You can turn this option on or off to adjust whether all the sites that need to be located can access your location.

Like Chrome, you can also allow or block specific sites from accessing your location. You just need to open the site with Microsoft Edge, click the lock icon (sometimes the danger icon) on the left side of the site’s URL, enter the site permissions and change the location permissions (default, allow, block).

Safari

When you visit a site using the geolocation service in Safari, you will be prompted to share your location with the relevant site. It’s worth noting that Safari has a “Remember my Decision of the day” option, and when you choose it, your decision (agree/reject) will only be valid for 24 hours, which is easier to modify than always agree or always deny.

To directly adjust location information, perform the following operations:

1) Click the Apple icon to activate the menu list and select “System Preferences”

2) Click the “Security and Privacy” TAB in the window that opens and click the “Privacy” TAB after entering. (Remember to click on the lock at the bottom of the window to enter the password to ensure changes and prevent further changes)

3) Click the “Privacy” TAB and select “Location Services” on the left. Here you’ll see the option to enable/disable location and the Safari app, which you can adjust to your liking.


The best way to set up browser location settings

Do you think your location information will no longer be exposed after looking at the various browser location settings above? No, it’s not! Some users said that even after they disabled the location permission in Safari and then go somewhere else to search for “weather” using their browser, or they will see weather search results for their real-time locations.

What happened?

It’s not that the browser is secretly tracking you after the location function is disabled, it’s that sometimes your location information is revealed along with your IP address!ClonBrowser

To protect your real location and personal privacy, you need a real privacy browser! ClonBrowser is a great virtual browser that offers you a completely independent browsing experience with advanced virtual provisioning technology and excellent integrated agents. The proxy allows you to have a completely unrepeatable IP address to hide your IP information and make it impossible for other sites to locate your browser. ClonBrowser has optimized your browser location settings to protect your security!